Use & Care Guide

Learn simple tips for using, cleaning, storing, and maintaining your carbide trimming tools so they stay reliable for everyday studio work.

Before You Start

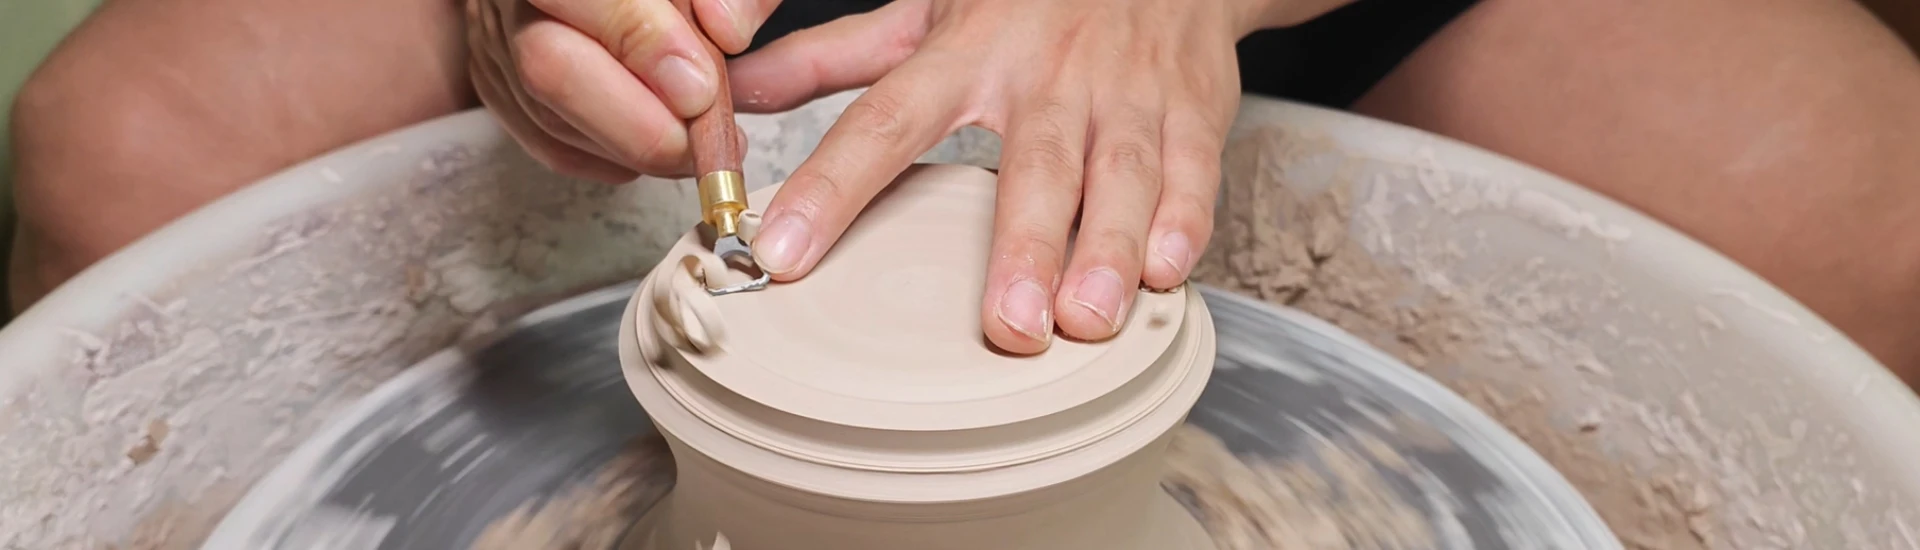
Trim at the right clay stage
The best trimming stage is firm leather-hard: the clay should hold its shape, but still cut cleanly. If the clay is too wet, it may stick, grab, or deform. If it is too dry, the tool may feel rough, resistant, or harder to control.
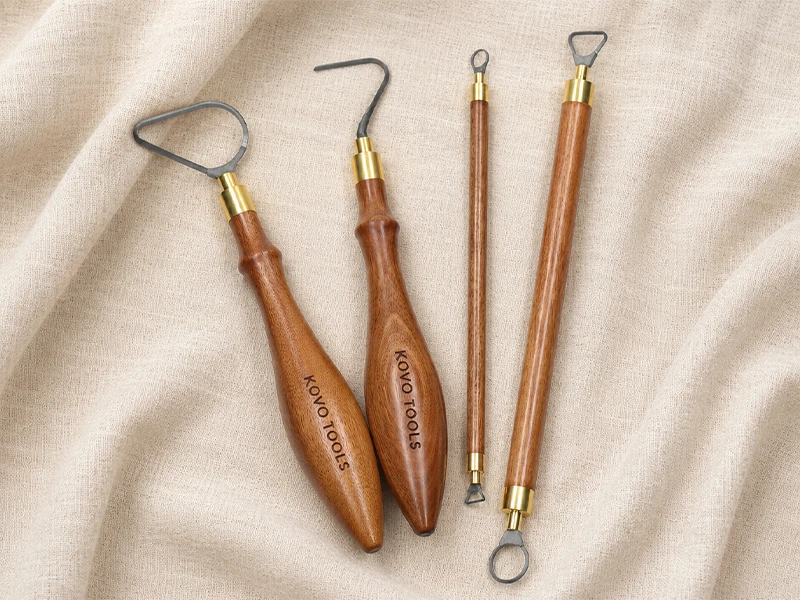
Choose the right shape
Use broader loop shapes for everyday trimming and wider surfaces. Hook-style shapes are useful for foot rings, corners, curves, and tighter areas.
Work with a Steady Setup
A stable wheel, bat, or trimming surface helps you keep better control and avoid unnecessary pressure on the carbide head.
Trim at the right clay stage
The best trimming stage is firm leather-hard: the clay should hold its shape, but still cut cleanly. If the clay is too wet, it may stick, grab, or deform. If it is too dry, the tool may feel rough, resistant, or harder to control.
Choose the right shape
Use broader loop shapes for everyday trimming and wider surfaces. Hook-style shapes are useful for foot rings, corners, curves, and tighter areas.
Work with a Steady Setup
A stable wheel, bat, or trimming surface helps you keep better control and avoid unnecessary pressure on the carbide head.
1 / 3

How to Use

Start with Light Pressure
Let the carbide edge do the work. You do not need to force the tool into the clay.

Use Smooth Passes
Trim slowly and remove clay in controlled passes. If the tool starts to drag or chatter, ease off the pressure and adjust your angle.

Adjust the Angle as Needed
Small changes in tool angle can make trimming feel smoother and more controlled.

Stop Before Forcing It
If the clay feels too dry or resistant, stop and reassess instead of pushing harder.
Daily Care

Clean After Each Session
Wipe away clay and moisture with a damp cloth, then dry the tool before storing.

Do Not Pry or Twist
Carbide holds its edge well, but the cutting head should be protected from drops, twisting, hard impact, or prying through dry clay.

Store Tools Separately
Keep each tool in a pouch, rack, or separated drawer so the carbide heads do not knock against other tools or hard surfaces.

Clean After Each Session
Wipe away clay and moisture with a damp cloth, then dry the tool before storing.

Do Not Pry or Twist
Carbide holds its edge well, but the cutting head should be protected from drops, twisting, hard impact, or prying through dry clay.

Store Tools Separately
Keep each tool in a pouch, rack, or separated drawer so the carbide heads do not knock against other tools or hard surfaces.

Sharpening Notes

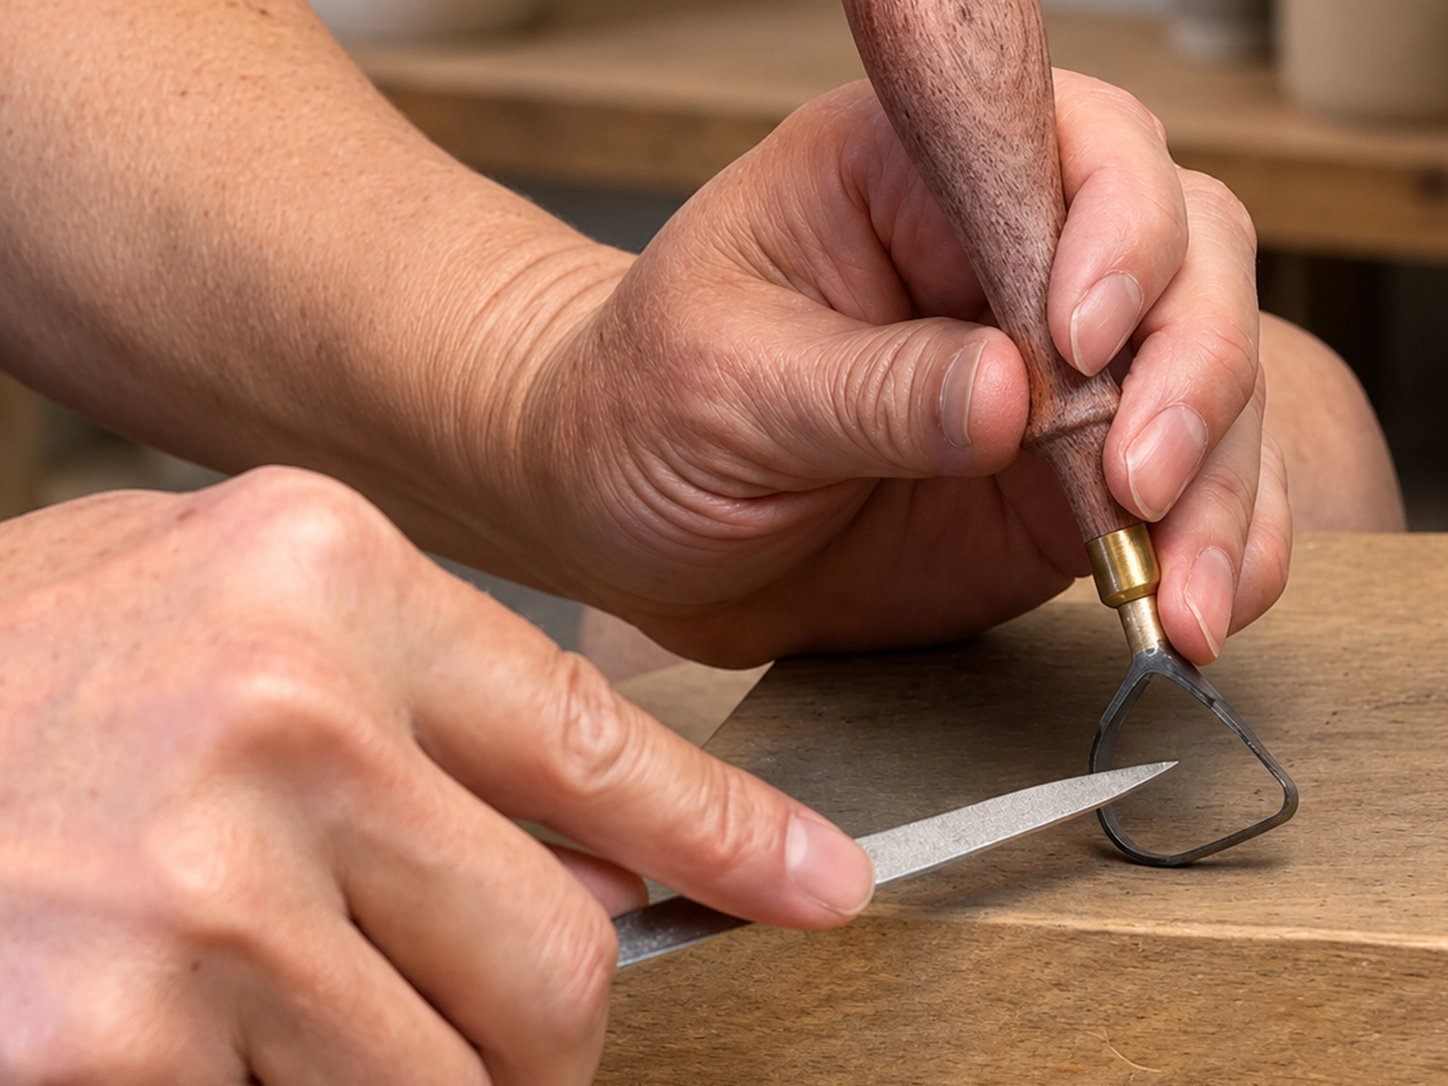
Light Touch-Up with a Diamond File

Carbide stays sharp longer, but when the edge feels less clean, use a 400-grit or 600-grit diamond file for a light touch-up.

Follow the existing bevel, use gentle pressure, and avoid aggressive grinding or changing the original edge angle. For smoother regular maintenance, 600 grit is usually enough; use 400 grit only when the edge needs a little more correction.

Carbide stays sharp longer, but when the edge feels less clean, use a 400-grit or 600-grit diamond file for a light touch-up.

Follow the existing bevel, use gentle pressure, and avoid aggressive grinding or changing the original edge angle. For smoother regular maintenance, 600 grit is usually enough; use 400 grit only when the edge needs a little more correction.

Shop Diamond File
Carbide Trimming Tool FAQ
Common questions about using and caring for your KOVO trimming tools.
Shop Tools
How do I know when my clay is ready to trim?

For best results, trim when the clay is firm leather-hard. It should hold its shape and produce clean clay shavings with light pressure.

If the clay sticks to the tool or smears, it may be too wet. If it chips, creates a lot of dust, or needs heavy pressure, it may be too dry.

Why does the tool feel dull or hard to use?

The cutting edge may still be sharp. The clay may be too wet or too dry, the tool angle may need adjusting, or you may be removing too much clay at once.

Try using lighter pressure, taking thinner cuts, and changing the angle slightly before pressing harder.

Why does the tool vibrate, skip, or leave uneven marks?

This may happen when the clay is too dry, the piece is not centered, the wheel is moving too fast, or the tool is cutting too deeply.

Make sure the piece is secure. Slow down if needed, use lighter pressure, and remove a thinner layer of clay.

What should I do if the cutting head gets stuck?

Stop the wheel first.

Gently remove the tool in the same direction it entered. Do not twist the handle from side to side, bend the cutting head, or pull it out at an angle.

Can the carbide cutting head break?

Tungsten carbide stays sharp for a long time and is highly resistant to wear. However, it is a hard material and does not bend like regular steel.

Protect the cutting head from drops, hard impacts, twisting, prying, and sideways force. Do not use the tool as a lever or force it through fully dry or fired clay.

How should I clean and store the tool?

Wipe away clay after each use with a damp cloth or sponge, then dry the tool before storing it. Do not soak the wooden handle.

Store the tool so the carbide head does not hit other tools or hard surfaces.

Carbide does not need frequent sharpening. If the tool no longer cuts well after you have checked the clay condition and your trimming method, contact us before sharpening it.


Keep your tools working better, longer.

Explore KOVO carbide trimming tools designed for cleaner trimming, steadier control, and long-term studio use.

Cart

loading